
I have a great selection of cookbooks – I also have a ton of recipes that I’ve printed out from the web or copied from magazines. I’ve filled up a binder that my Mom made me – and more. It was time for a new one.
You’ll never guess where I went “shopping” for ideas. What? Anthropologie you say? Well of course. And as usual – they delivered. You’re shocked. I know. I found the cutest little Recipe book. Click here to see it.
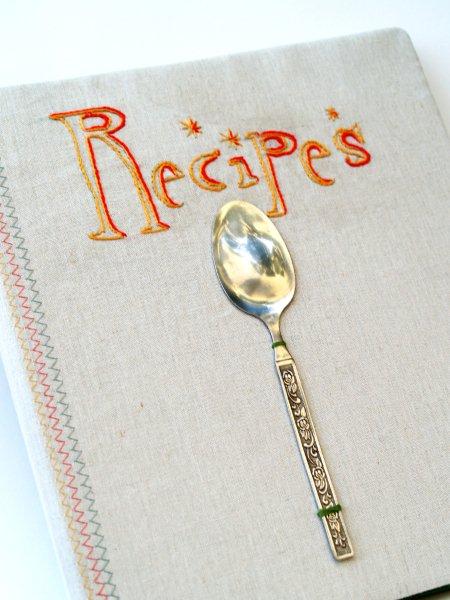
I loved the design of theirs – and that little spoon – but I wanted a Binder version. Here’s mine!
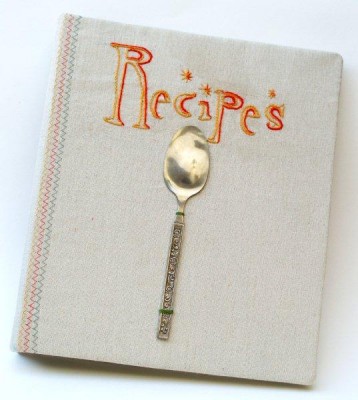
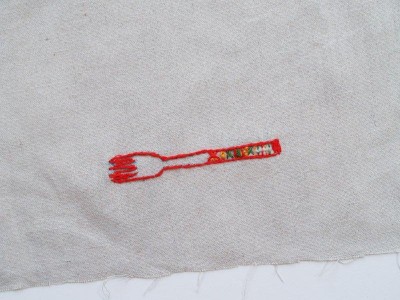
I even did the little fork on the back of the book.
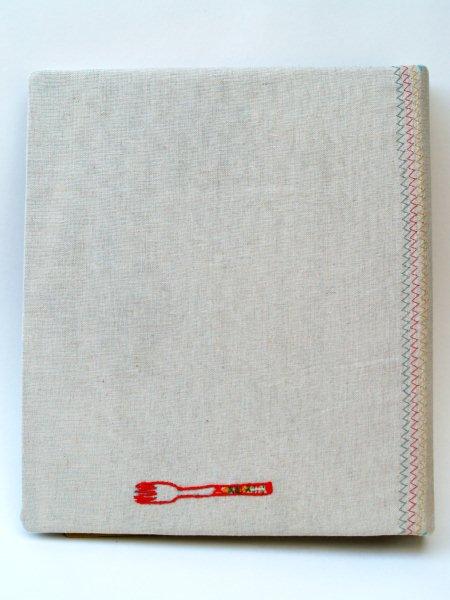
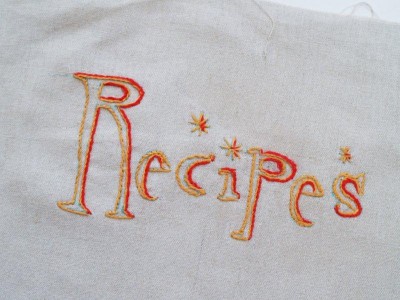
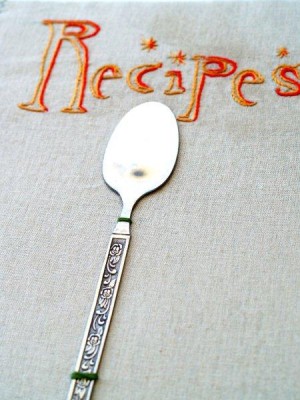
I’m really pleased with how it came out. I used a more retro-diner style font but I kept to the colors and style because those go great with my kitchen. I also changed the text to “Recipes” (plural) rather than just ”Recipe”. I plan on keeping more than one in there and not having the plural would have bugged me.
Here’s the supply list if you’d like to make your own:
- Fabric for covering the binder – a little more than twice the size of the binder
- A Binder or notebook - mine is a 1″ Binder
- Embroidery Floss and Coordinating Thread
- A spoon :)
- Hot Glue Gun and Glue
Posterboard or light cardboard
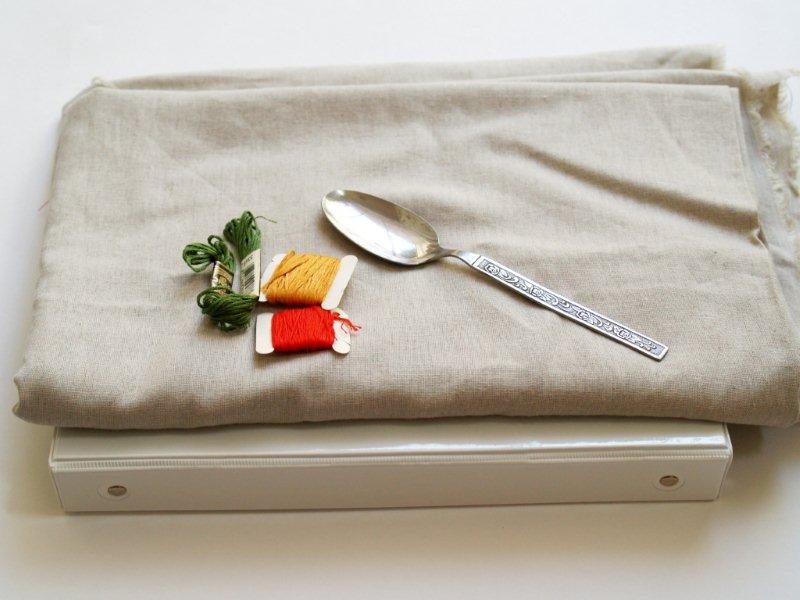
We’ll start with flattening the spoon. You can do that at any point but it’s the most fun so why not start there?
Lay your spoon on an old towel outside.
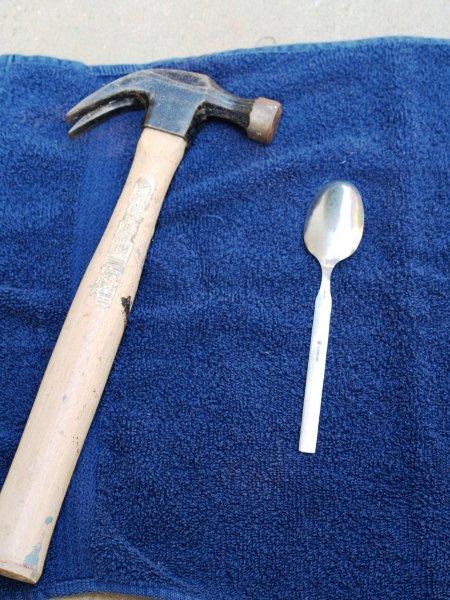
Cover the spoon with the towel and, using a hammer, beat the spoon until it’s flat. It won’t take too long.
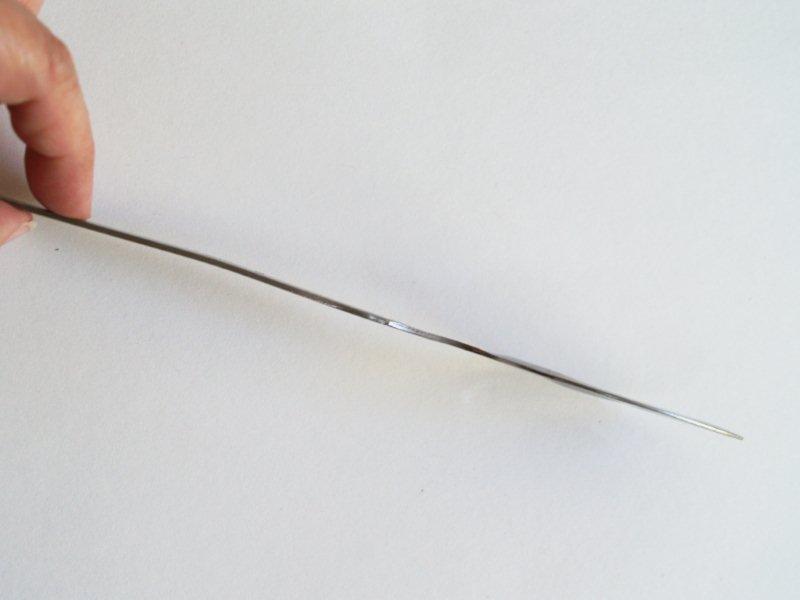
Wasn’t that satisfying?
On to the binder! Cut out a rectangle of fabric about 1″ larger than your binder on all sides.
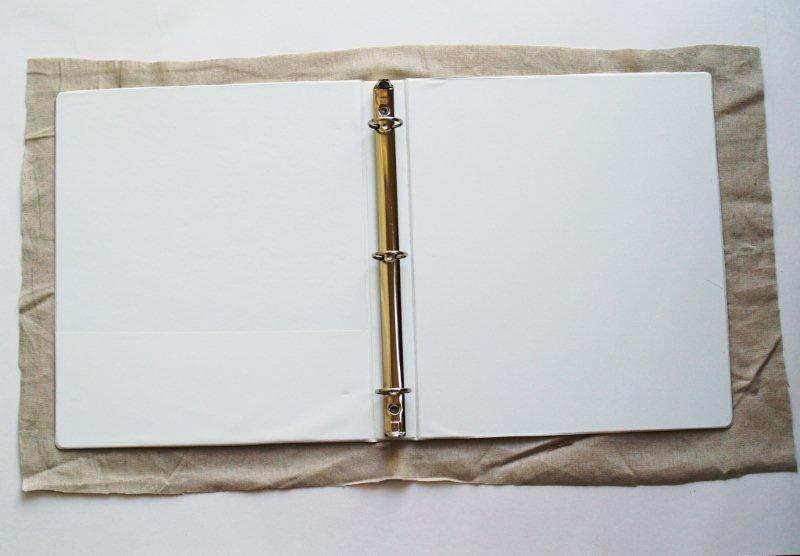
Mark the corners of your binder with a fabric marking pen. This will help you center your design and do the zig zag stitching. I hope you can see those little marks.
Decide on the design that you’d like. You can make your own, or you can print out the one I used with the link at the end of the post.
Trace your pattern onto your fabric with a fabric marking pen. An easy way to do this is to tape your pattern to the window, then tape your fabric on top of that. The light will shine through and you will be able to easily trace the design.
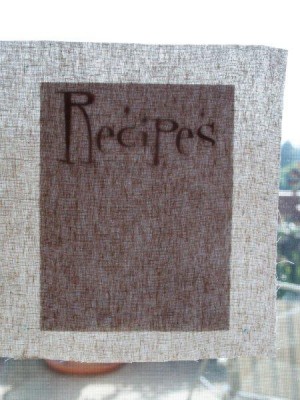
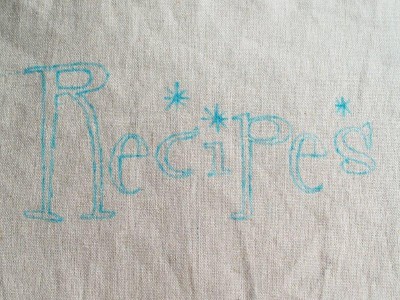
Place your fabric in an embroidery hoop and outline the letters with a stem stitch. To do this, bring your thread up at the corner of the “R”.
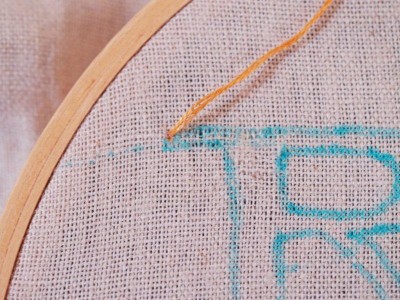
Here is a picture to help you with the stitch. The point you brought your thread up is point “A”. Put your needle in at point “B” and then bring it back out at point “C”. There should be an equal distance between A, B, and C.
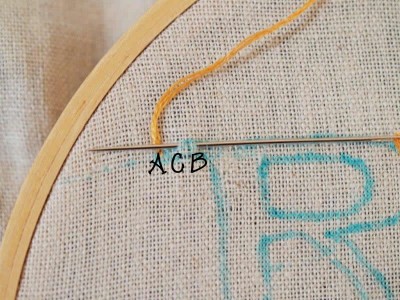
Pull the thread through.
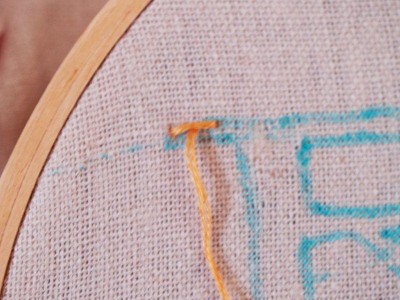
Now repeat the steps, keeping the loose thread above the stitch. In at “B”, out at “C” but your stitch will touch the end of the previous stitch.
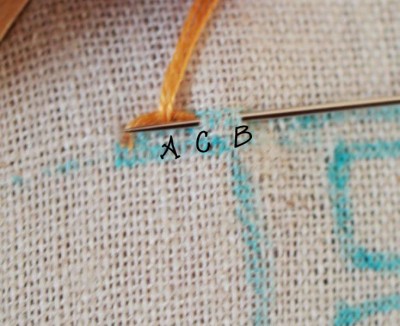
Continue this stitch around the outlines you’ve drawn.
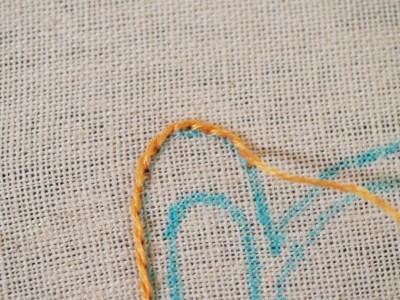
I sewed all the lines in gold embroidery thread, then I accented the right side of the letters with a reddish orange – kind of like a shadow.
For the fork, I traced the pattern so it would be towards the bottom of the back of the binder. I outlined the fork with the same stitch, then just filled in the end section with some random lines and crosses.
For the decorative zig zag stitching, I switched to my machine.
Using the markings at the corners of the spine, draw a line from the top to the bottom of the fabric. Repeat for the back.
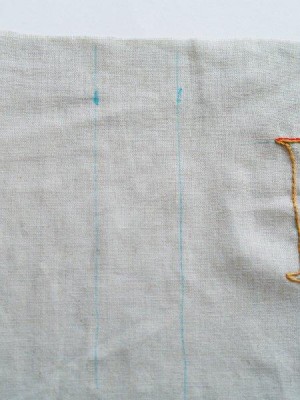
Follow the marked line with a zig zag stitch, using thread that matches the colors you did in the embroidery. I did three rows on each side in three colors.
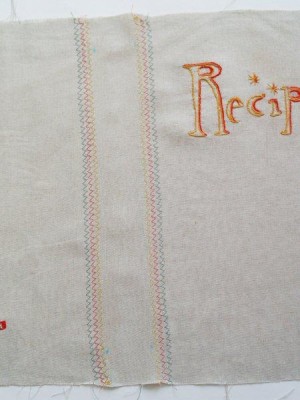
This is a good time to remove all your marking lines and dots.
Sew on your spoon. I sewed it at the narrow section and towards the bottom.
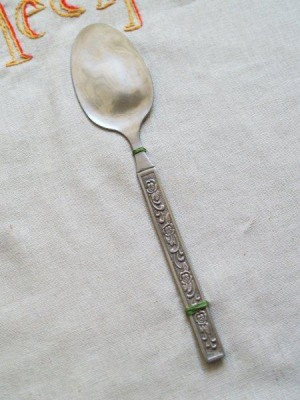
Lay your fabric out, wrong side up, and center your binder on it. Make sure the spine is between your zig zag stitching.
Fold the bottom center section under, at the spine. Glue down (with hot glue) this section, slipping the fabric under the metal binder piece. You should have no raw edges of fabric showing.
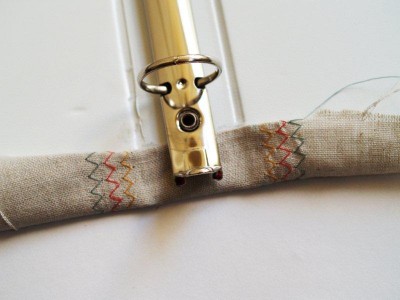
Repeat with the top center section.
Fold over the left side section and glue down. Pull the fabric tight but not so tight that it stretches or distorts. Don’t worry about raw edges here – this will be covered.
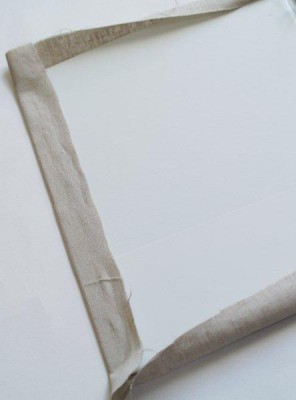
Repeat with the right side section. Then glue down your top and bottom sections.
For the corners, trim a “V” of fabric out of the piece that is not glued down. This will help the corner lay down flat.
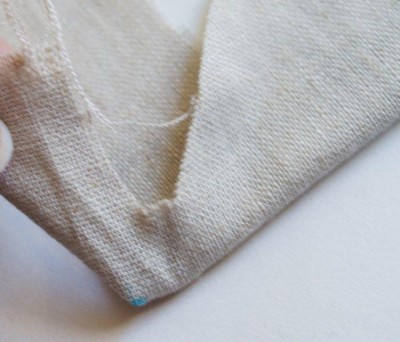
Glue down each corner.
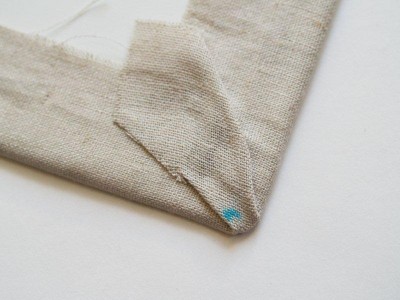
The outer edges of the binder should all be glued down now.
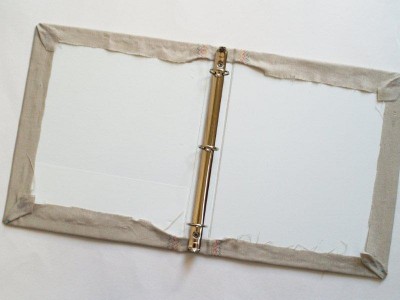
Cut a piece of posterboard or light cardboard slightly smaller than one side of the binder. Make sure it doesn’t cover any of the spine or the binder won’t close properly.
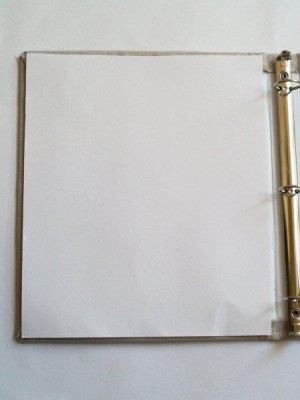
Cut a second piece for the other side using this as a pattern. Cut out 2 fabric rectangles slightly larger than your posterboard.
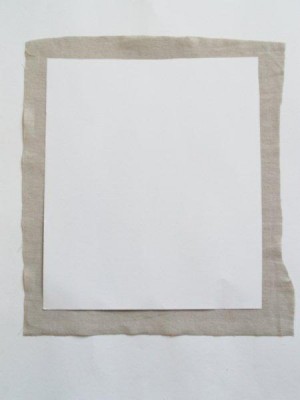
Obviously it doesn’t have to be perfect. Yes. I failed rectangle cutting in elementary school.
Glue down the edges of your fabric to the posterboard just like you did with the binder. Start with the sides first, then do the top and bottom, then the corners.
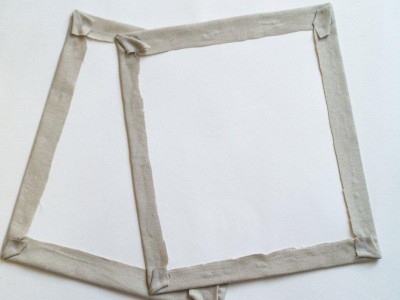
Turn the rectangles over and place them on the inside of the binder. Glue one down on each side, making sure to get the edges and corners really well.
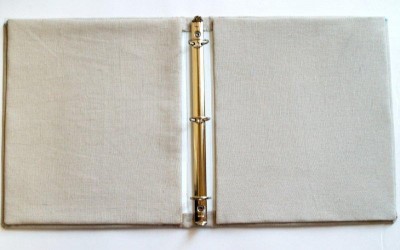
You might also want to add a bit of glue under the top of your spoon to help hold it down.
Wasn’t that fun? Other than those little glue gun burns. We won’t mention those.
As I was making this, I thought of a couple of ways you could do it differently. If you wanted to skip the gluing, your could sew a cover for the binder, making the sides into pockets that you slip the binder into.
Or you could make the whole thing no-sew, and use a transfer or fabric paint for the design. I love options!
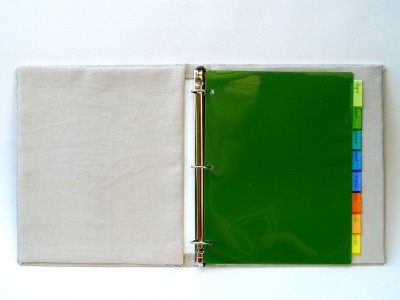
You can put dividers inside to organize your recipes. I also have plastic sleeves for the pages, so I can reuse them without getting stuff all over the page. I’m a messy crafter and a messy cook.
This would be fun to give as a gift, with some of your favorite recipes. You could even take it a step further and embroider their name inside.
Here’s the download if you’d like to use this design.
•••
For more crafty inspiration, visit Flamingo Toes

To have your ideas featured on somewhat simple, click HERE
I love this. I have been on a search for the "perfect" recipe binder, I may have to do this instead so I can make it what I want it to be! Thanks for sharing!
ReplyDeleteI made recipe binders for my sister in laws of family recipes when they married into the family. This would have made a much better cover!
ReplyDeleteI keep my recipes in a binder and this is a great idea to make it cute :) THANKS!
ReplyDeleteI am now inspired to better organize my recipes. Thanks!
ReplyDeleteWhat a great idea, this would be cute for a scrapbook too!!!
ReplyDeleteI love seeing how to sew the embroidery thread...I am a beginner and definitely need each step!
ReplyDeletethis is so cute! I love the spoon on the front.
ReplyDeletegail
very cute i don't think it's simple enough for me but i do like it!
ReplyDeleteSo cute! I wouldn't have thought of that!
ReplyDeleteHahahaha when I saw the first picture, I thought, "Wow! What a cool spoon decal thing! I wonder where that's from?" And lo and behold, it's an ACTUAL SPOON! Love it!
ReplyDeleteVery cute!
ReplyDeleteGreat idea! Especially love the instructions on how to trace the font for embroidering. I've been meaning to organize all my recipes into a 3-ring binder, maybe this cute project will give me the impetus I need to get it done!
ReplyDeleteI really love this idea for organizing my recipes, mine are all over the place.
ReplyDeleteI just found my Christmas gifts for several people. This is SO CUTE! I'll be mass producing these to have as gifts. Thank you for sharing!
ReplyDeleteLove this idea!
ReplyDelete{Rebekah}
Such a fun idea! This would make a great gift too.
ReplyDeleteI so don't need to start another project right now, but you've inspired me! :)
ReplyDeleteThis is so darn cute!Nice job!
ReplyDeleteI love this... I can think of so many things I can use this for....
ReplyDeleteI adore your blog.... I am new to this... My neigbor told me about it and I am hooked...Thank you
Cute!!!
ReplyDeleteI'm already a follower of Flamingo Toes. She has some great ideas and patterns!
ReplyDeletesuper cute!! great idea :)
ReplyDeleteWow I really really love this!
ReplyDeleteI want to make one just so I can flatten a spoon!
ReplyDeleteI must make this, it is so cute!
ReplyDeletevery cute I am planning on starting a recipe binder soon I will have to keep this idea in mind
ReplyDeleteVery clever
ReplyDeleteI've got a recipe binder going, but not one that is this cute.
ReplyDeleteAnthro? Who would have thought? Very cute!
ReplyDeletecute! can you come to my house and organize my recipes? my husband would pay you handsomely to clean up that area of the house. :)
ReplyDeleteI think I might put all my patterns in a recipe book like this - great idea.
ReplyDeleteI LOVE THIS!!! I have all my recipes in the same white binder, I think I might just have to spruce it up a bit :)
ReplyDeleteThanks for the inspiration!
XO
What an inexpensive way to organize recipes! I love it!
ReplyDeletelove the spoon idea, so cute.
ReplyDeleteGreat idea! I use a binder for my recipes also and love it!
ReplyDeleteCute idea!
ReplyDeleteI have a simple undecorated recipe binder. I'd leave it out on my counter if it looked like this! Great idea~
ReplyDeleteso cute! i really love this idea!
ReplyDeleteI need one to organize my recipes they are all on random pieces of paper.
ReplyDeleteLove the spoon! What a great idea
ReplyDeleteI have been putting my recipes in a binder, but I absolutely love using a spoon on the front and the embroidery reminds me of something my grandma would have. Great inspiration!
ReplyDeleteCute idea!
ReplyDeleteWow. this is much cuter than my lover-ly giant envelope full of recipe clippings.... I like the smashing of the spoon too!
ReplyDeleteThis uses my most favorite font. I love all the techniques used. I don't see much embroidery these days...or maybe I'm not looking in the right place.
ReplyDeleteThis stay in my project file!
This is so cute! I love the idea of using an actual utensil!
ReplyDeleteHow cute! I would have never thought to pound the spoon flat. What a way to be inspired while you cook. :)
ReplyDeleteThis is ridiculously cute! Hmmmm...ideas forming.........
ReplyDeleteThat turned out so cute!
ReplyDeleteI love this! Especially the beating part :)
ReplyDeleteI love the recipe binder! That is very cute!
ReplyDeleteThis is darling! I don't know if I could make mine look as cute! I may just have to try though!
ReplyDeleteLove how you used a spoon on the cover! whimsically FUN!
ReplyDeleteWhat a clever idea to put a spoon on the front! LoVe It!!!
ReplyDeleteWay cute! I'm actually in the process of looking for a great way to keep my recipes! This would be great!
ReplyDeletelol, I am pretty sure my grandmother has some of that same flatware!
ReplyDeleteSooo cute I love it!!!!
ReplyDeleteI love this. I have a full binder and lots of loose recipes. I need to make one of these for favorite recipes and put the ones I always reach for in it.
ReplyDeleteYou're right, it would make a great wedding/shower gift! Easy to have made and on hand.
Very cool recipe binder! I'm hoping to win a Silhouette!
ReplyDeleteI love this. So creative!!
ReplyDeleteTeresa
labgirl10@yahoo.com
Very cool idea...I like the dimension the fork adds.
ReplyDeleteAbsolutely adorable!
ReplyDeleteThanks for the tutorial, I habe been wanting to learn to embroider, but didn't think I could do it...now I think I may be able to!
very cute idea.
ReplyDeleteLeslie
I want to make one!
ReplyDeletevery cute!
ReplyDeleteVery creative! Love the idea of flattening the spoon. I will have to keep it in mind and incorporate it. The sewing looks great, but beyond my capabilities right now.
ReplyDeleteI am thinking that would be a great Christmas gift.....stuff it full of grandmas old recipes :)
ReplyDeleteI like this idea for family treasures like old pictures from grandma and grandpa and other items that don't fit into a photo album.
ReplyDeleteI would have never thought of flattening a spoon like that. Thanks for the great idea.
ReplyDeleteI really love this idea for organizing my recipes :) they are just scattered around right now haha
ReplyDeleteI just use the box I got from my bridal shower. This is a neat idea though. I love the idea of flattening the spoon for a decoration!
ReplyDeleteThis recipe binder is so cute and smart! Love it!
ReplyDeleteI love this! I need a new way to keep up with my recipes, I think I will try it!
ReplyDeleteLOVE THIS! Even better thats its easy to make. Thanks for the idea!
ReplyDelete:-) Jeanette
I never knew it would be so easy to flatten a spoon!
ReplyDeleteI love the spoon! But, don't think I'm crafty enough pull this one off! Love it!
ReplyDeleteGreat idea. Not sure I know how to hand embroider anymore.
ReplyDeleteI keep switching up how I do my recipes... different sized cards, binders, etc. This is a totally cute idea. thanks :) Perhaps it'll be my last!
ReplyDeleteThis would be a great project for recipes! Maybe if I had something cute like this I would be a little more organized instead of having all my recipes in a shoebox!
ReplyDeleteI LOVE those cupcakes! YUM. Hope to win a silhouette to make bunco shirts! :)
ReplyDeleteThis would make such a cute wedding present! What a great idea. I especially love the spoon!
ReplyDeleteI need to "freshen" up my binder, thanks for the inspiration!
ReplyDeleteI need to "freshen" up my binder, thanks for the inspiration!
ReplyDeleteHow adorable!
ReplyDeleteI LOVE recipes and this is a great idea!!
ReplyDeleteSuper Cute! I have soo many loose recipes that need to be organized!
ReplyDeleteLove love love it!!!!
ReplyDeleteSo cute! I need one of these!
ReplyDeleteWhat a cute idea for a recipe book.
ReplyDeleteI'm always looking for cute ways to store my recipes! This will work great!
ReplyDeleteSO cute!!! Thanks for the tutorial!
ReplyDeleteAmber
"R"emarkable. What a fun idea to use a spoon on the cover. Love the idea and the designs.
ReplyDeletegreat idea...im going to do this for my sister who just moved out into her first apartment!
ReplyDeletethis is a very clever idea!
ReplyDeleteFun idea to make it unique!
ReplyDeleteFun! Love the drop-cloth-y fabric.
ReplyDeletekristabean at sbcglobal dot net
Very unique idea..i Like it!
ReplyDeleteFantastic! I have always wanted to try hammering out a spoon. My sister took a metal smithing class last semester so I may still have her watch over me so I don't mar it too bad but that project is great!
ReplyDelete